Sunday 30 December 2012

Contact! AAR


I played out a Falklands War scenario using Cold War 83 rules yesterday. I’ve been working on a set of scenarios that I’ve adapted from Rules of Engagement so they would work with the Falklands and Cold War 83 rules. This has meant I’ve had to produce Army Lists as the scenarios allow the players to choose a value, generally an understrength platoon, force which has a ‘combat effectiveness’ and then strengthen it using additional ‘support points’. The principle is that the better quality the force is, as expressed through its ‘bottle’ value, the fewer troops you get. There are also deployment, game length and victory criteria rules for each scenario.

The simplest scenario is ‘Advance to Contact’ as it doesn’t involve any ‘extras’ like hidden deployment, supporting artillery or fortifications. The premise is that two opposing patrols have bumped into one another in no-man’s land and win by inflicting enough casualties on the other side to break them before they reach their own break point.

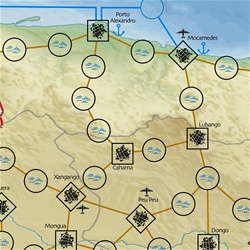
Here’s the table I used.

  For my game I pitted a platoon of British Paras against Argentinian Commandos. The idea was that this could be the sort of encounter that could have happened just after the British landing at San Carlos with the Paras probing out of the beachhead and Argentine Special Forces reconnoitring to try and assess the strength of the British presence.

Both sides were of good quality with base bottle values of 8 although the British did have the advantage of 3 GPMGs and 24 men as opposed to 1 GPMG and 21 men for the Argentines, although the latter did have a sniper and a couple of grenade launchers.

The British had the initiative and got to choose which table edge they would deploy on and also whether this was a day or night action. They elected to deploy on the top table edge in the picture above and went for a daytime patrol. The roll for weather indicated this was a clear day but the roll for time of day gave me 12 turns to dusk. Given that the scenario is 12 turns long if the opposing forces deploy on the short table edges that fitted with a late afternoon encounter that would end with reduced visibility allowing one or both sides to slip away.
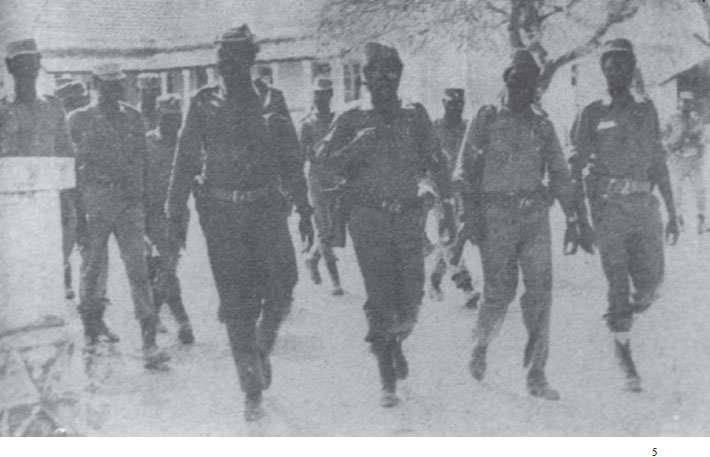
The Argentines had one full strength section of ten men, armed mainly with G3 Rifles and Grenade Launchers, together with a GPMG. The HQ group (commander, NCO, sniper and radio operator) was supported together with an understrength section armed mainly with SMGs. The lack of long range firepower and the terrain were to be the Argentinian’s greatest handicaps. To close with the British they had to bunch in the dead ground in the lee of the central hill in the picture, which meant that once the paras started getting rounds down from their GPMGs the risk of suppression was increased. This is exactly what happened – a few failed bottle rolls for movement meant one of two Argies got caught by GPMG fire crossing open ground with the result they became casualties and the men in proximity were suppressed.


In the picture above all the figures with a red band are suppressed and two have reduced bottle values, as denoted by the dice. The figure in the foreground has been hit so badly that any further reduction will mean he’s removed from play. In reality he’s probably severely wounded and about to die…sobering thought.

It wasn’t all one sided though. The Argentinian sniper killed one para outright with a single shot at long range and a couple of others fell victim to ‘double taps’ from commandos with G3s who got themselves into good firing positions.

Weight of fire told in the long run however and by the end of turn 7 the paras had gone firm on two pieces of high ground that dominated the battlefield and had effectively pinned down their opponents who were steadily taking more casualties.

In the above picture, taken from behind the Argentine position, the funnelling effect of the dead ground can be seen. With exception of the figure with a double 5 die next to it, all the figures with dice next to them have suffered a reduction in bottle, either because they were caught in open ground by British fire or because they were close enough to a comrade who was hit by GPMG fire. Senor Double Five has had his bottle increased as a result of a clean kill at extreme range. All the figures with a yellow marker are prone. In the background the British dominance of the two hills on the left and right respectively can be seen.
The Argentinians had taken seven casualties removed from play by turn 7, meaning they’d reached their break point (one third of starting strength rounded down) and had to dice against the commander’s bottle to see if they fought on. He was still on his starting value of 9 and easily passed. The paras had eight men removed from play but their break point was at half strength rounded down.
I’d been playing for a little over two hours and couldn’t see much happening for the remaining turns. To cross open ground to try and close in daylight was suicide but the long range firefight was proving inconclusive as nearly everyone with a clear line of sight had gone prone and/or had lost a point or two of bottle. The Argentine GPMG was out of action and neither of the grenade launchers had been able to get within range.
Accordingly, I took a decision to end it there as a draw. The encounter had been violent and bloody with lots of fire and movement to begin with and then everything slowing down as the troops became more cautious.
Lessons from this are that machine guns in daylight quickly close down a battlefield and that Argentine Special Forces are more than capable of giving a good account of themselves.

Friday 28 December 2012

Decision Games: 'Border War Angola Raiders'

Part of the map - the top is west
Border War is part of the Commando mini-game series. Once a battlegroup is organized, you move it across the border. When a force enters certain points an Event Card is picked. Events can include anything from special intelligence information to the appearance of major enemy forces. There’s a range of foes, from SWAPO insurgents and Angolan government regulars to powerful Cuban armored formations. Combat is resolved via a quasi-tactical procedure in which both tactical superiority and firepower play their parts. There are special rules for helicopter reaction forces, PSYOP, and leaders.

The above is from the blurb on the Decision Games website and it's all true. This game, and another in the same series 'Congo Merc', were waiting for me when I returned form holiday today. There had been a bit of a hiccup in them getting here - I originally ordered and paid for these games back in August and when they hadn't arrived by November I contacted Decision Games. Anyway, after a bit of tooing and froing they finally got here.

The games are specifically designed to be played solitaire in about an hour. My original motives for buying them were that I might be able to take them away with me when I'm travelling with work and secondly, I may be able to adapt the system to allow me to play a campaign that would add a bit of structure to the narrative of my alternative timeline and tabletop games.

On opening the ziplock package, I thought the map will be useful if nothing else. It's part of Southern Angola from the Atlantic Coast in the west to Jamba in the East and extends as far north as Caconda.

I've played one game and read this quite critical review: http://boardgamegeek.com/thread/883766/a-hard-look-at-a-mini-game. It's hard to knock a US$13.00 game and the only criticism I agree with is that the victory conditions are a bit bland - 'recover x number of "real objectives"'...

What this means in practical terms is that you move one of your 'forces', which can be made up of one or more company sized units, onto an objective marker and, depending on how lucky and/or successful you are in dealing with the card generated events that subsequently occur, you get to see if it's 'real' or a dummy. The card generated events may mean you have to fight off SWAPO or FAPLA or the Cubans (you're commanding the SADF troops here...) and that can be bloody.

If the designer had taken the trouble to add a bit of flavour to the objectives - for example, defining these as PoWs or simply trashing a SWAPO base then it would be more believable. It is a mini game though and the system is applicable to the other game in the series, 'Congo Merc', and maybe there are more to come?

My other criticism is that I'm commanding the South Africans - and this is a bit creepy given the repugnant political system my boys are fighting for. And while I'm at it, the rules do nod towards the 'unsavoury' nature of what 'my' commandos are up to in this and 'Congo Merc', but what about a solo game where the player is the FAPLA  or SWAPO commander/ I appreciate that neither of these organisations fought for a completely noble cause either but they were, on the scale of things, fighting for something better than the Apartheid regime.

Anyway, back to the game...

I played out Operation Reindeer form 1978 and dropped a battalion of paras on Cassinga, supported by airstrikes and helicopters as well as sneaking a special forces unit across the border at Ngiva. The Ngiva operation was a success - SWAPO base destroyed, lots of prisoners taken, documents captured inciminating the Soviets and Cubans - but the Cassinga airdrop turned into a bloody disaster. The objective turned out to be a dummy so the paras had to fight their way to Caconda where they did succeed in neutralising the SWAPO base (I'm editorialising here - in game terms it was merely a 'real objective'...) but were wiped out in the process.

This was good fun and gave me plenty of ideas for a table top game or three and was all over in less than an hour so it does have potential to fill in the odd bit of spare timeif I want to generate some ideas or just have a game.

The solitaire system works quite well and their appears to be enough variety in the scenario generation system to keep things interesting for a while. So, on balance I'd say 8/10 - after all it was only thirteen bucks...

Sunday 16 December 2012

Fiddler's Bottom AAR

Fiddler's Bottom: the village is at the top of the picture - the Scots attacked from the right - if you look carefully you can just make out the deployment zones of the two sides marked with dice. We played 300 points each on a 3 x 4 foot table.

 
The armies lined up at the start of the battle. The Scots in the foreground, mixed pike and shot in the centre, lancers on the right flank, pistols on the hill on the left flank and a reserve of pike in front of the baggage.
 
Grimstone's three new modelled infantry regiments are in the centre with 400 ironsides deployed as a refused flank on the left of the picture and his dragoons and remaining Ironsides on the right.


Early moves - the Scots pistoleers have moved forward off the hill to support the attack in the centre by the massed infantry. The Scots right flank stands firm while keeping a wary eye on the advancing Ironsides opposite them.

 
The Scots have (improbably) made havoc amongst the New Model horse on the left, in the centre they are winning the firefight and on the extreme right 150 lancers have bravely charged 400 Ironsides

 
Lancers have died bravely - the Ironsides withstood the shock of their charge and then set about them with sword and pistol. The Scots are hurridly trying to redeploy their infantry before they are rolled up from the shattered right flank. In the centre though the New Model is collapsing as the rolling volly fire from the Scots infantry takes its toll. On the right the Ironsides charge in but are stopped by heavy fire from the Scottish horse  and supporting musketeers.It's a close run thing but panic grips Grimstone's army as the losses in the centre leave a gaping hole and his right flank is shattered. Ferguson is triumphant!


Wednesday 12 December 2012

True and Happy Newes from Fiddler's Bottom

 
Vpon Wednesday last Colonel Grimstone marched towards Chester with his Army, being in number 900 Horse and not not above 2000 Foot, and at his comming thither our gallant Sir Alexander Ferguson stood in opposition against him, where Colonel Grimstone caused his men to discharge so fast, insomuch that there began a great skirmish betweene them, holding for the space of two houres: Colonel Grimstone with his Forces began to retreat, and at that time the Colonel lost 300 men, and Sir Alexander 200 men. The said Colonel Grimstone was put to flight, to the great hurt of his Masters Cause, and he hath already spoiled his name amongst them. This Newes was sent to this scribe upon the Saturday last, which signified that the Kings cause is not lost, and that more men are marching to his banner. Sent in a letter from the Honourable Sir Alexander.

Tuesday 11 December 2012

The Battle of Fiddler's Bottom 1648: Preliminaries

Harbottle Grimstone, living up to his name

A little known encounter between the invading Scots and a detachment of the New Model Army in Cheshire, a few days after the defeat of Langdale's Royalist army by Cromwell and Lambert at Preston.

The Scots were widely dispersed, as many of the men were foraging and news of the disaster that had befallen their English allies to the north had yet to reach all of their detachments.
 
One such detachment, fewer than 4000 strong, had made good progress deep into Cheshire, unencumbered as it was by an artillery train or much by way of baggage. The men were cold and wet, it having been a typical English summer. Although they numbered 3000 foot, their cavalry were weak, being only 750 strong and mounted on small nags. Barely 150 were lancers, trained to charge at the gallop, the remainder being pistoleers who had the unhappy reputation of 'burning much powder to no great effect'.

Their Commander was Sir Alexander Ferguson, a veteran of the wars in Germany and the first civil war in England, where he had fought alongside his opponent in this war, the redoubtable Harbottle Grimstone.


Ferguson takes his standard and plants it in Fiddler's Bottom...

Grimstone, one of Cromwell's 'plain russet coated captains' chanced upon Ferguson near the small village that gave this battle its name - that of Fiddler's Bottom.

His men had been 'new modelled' and numbered some 3000, around a third of whom were experienced cavalry or 'Ironsides'. He had a couple of hundred dragoons, armed with firelocks and the remainder were the solid but unremarkable parliamentary infantry.

Ferguson would have preferred to avoid battle, despite his numerical superiority. These men were not the doughty old veterans of Marston Moor, rather they were young lads, much reduced by the hardships of campaigning. Harbottle's force sat astride the Scots' line of retreat however, and rumours of the defeat at Preston led him to conclude that he had little option to fight in the hope that he could open the road north and unite his small force with the main Scottish body.

In other words, a game of DBR is scheduled for tomorrow evening...

Sunday 9 December 2012

Glossy and Colourful...


Force on Force Rulebook

Was away all last week at a conference but managed to visit a very good book shop and get hold of a copy of 'Force on Force' and the 'Cold War Gone Hot' and 'Bush War supplements.

I didn't know much about the rules and I usually resist the temptation to splash out on glossy, colourful copies of rules - I'm much more a monochrome Cold War 83 or DBR kind of chap. However, I've wanted a copy of this set for a while though as what I little I did know appealed to me greatly i.e. the emphasis is on the men not the weapons.

So there is an intriguing method of reflecting troop quality using different types of die (D8, D10, D12 etc) - not too sure about this - and no weapons tables for infantry weapons - like this idea.

Since the accent is on infantry combat that means no tables or a very minimal one for a few vehicles. The idea of different quality troops firing at different 'optimum ranges', whilst all weapons can fire across the table (line of sight restrictions notwithstanding), is really good. Shades of Phil Barker's 'Inferior' shot firing 100 paces whilst "Ordinary' and 'Superior' blast away at 200 paces.

The game is designed to be played around scenarios which means more work than a pick up and play set of rules but that's not necessarily a bad thing. And anyway the supplements provide plenty of suggestions in that department.


Davai! Davai!
 The Cold War Gone Hot supplement has been extensively reviewed in far more detail than I will here. It's unusual in that it covers a hypothetical war - but one which looked very likely for all that. I remember that by the mid eighties, with SS20s and Cruise Missiles being deployed in Europe and Reagan and Thatcher in office and CND out on the streets, the prospect of a conflgration in Europe seemed all too real.

The scenarios are in three groups. The first is the Cold War heating up as the West feared it may, with a massive Soviet led invasion of Western Europe and thousands of T-72s trundling across the north German plain towards the Rhine. The second is more realistic given what we now know, with NATO taking on a Warsaw Pact that is more of a military version of a Potemkin village. The third is a bit silly even for the nerd that I fear I may be - it's Hollywood's version of the war between the West and the Soviet bloc. Mid -western college boys resisting a Soviet occupation of the USA... 

There are handy ORBATs, some interesting scenario ideas that could be easily tweaked to be fought by different forces than the predominantly US versus Soviets ones that are listed and a few additional rules to go with these.


'We had joy we had fun, killing floppies in the sun'

The Bush Wars supplement is a useful addition to my library of African War rules and scenarios. If I'm going to get serious about playing these rules I'll have to consider re-basing my Cuban, Angolan and South African armies as the rules are designed for individual figures. That said, it wouldn't be too hard to amend the rules to play with my figures as they are based now, with three figures to a base for SLRs, Assault Rifles, LMGs etc and two for RPGs, HMGs etc

Again, there are plenty of good scenario ideas which can be easily tweaked to be played out between different forces.

The politics of the war(s) being played out is more evident in this book than in the main rule book or Cold War Gone Hot. The reality is that there is even less of a consensus in the West about African wars of de-colonisation and the Border War than about the current war in Afghanistan and the war that never happened in 1980s Europe.

I'm sure I'll buy a load of dice and give these rules a go. It's only a question of time.

Like Cold War 83, the basic rules would work equally well for any 20th century conflict with a little adpatation - how about the Russian Civil War?

Tuesday 4 December 2012

Chetequera March 1976


'We start training next month, by the beginning of the rainy season you will have ample supplies of weapons and ammunition and we'll be in a postion to overwhelm the Boers.'

'They know that with the victory here in Angola that the liberation movement will intensify its efforts across the border. We can expect an elevated state of readiness on the part of their security froces, they won't give up wihout a fight.'

'We'll use the winter to put all cadre through a programme that will prepare them for an intensified struggle. Our Cuban comrades will provide instruction and we've been promised that shipments of Czech manufactured small arms and ammunition will  begin to arrive via Luanda from April. The first batch left Constanta last week.'

'The new recruits should start arriving next week, they need to begin basic training immediately. Our Cuban comrades arrive the week after next - I want them to see that we're not completely incompetent...'

'Any questions?'

'Of course comrade,  I appreciate your question. I am confident that together with the support of our brothers and comrades from across the Atlantic and with the new weapons that our fraternal comrades from the north are sending us we will strike a decisive blow against the racists.'

Saturday 1 December 2012

'This War Without An Enemie'


Periwinkle Brushes Aside a Rebel...

I have managed to get a fair amount of gaming in over the last few weeks, not that you'd know from the posts on this blog.

This is partly because every game I've played has been set during the 17th Century English Civil War - and it has been English - Royalists versus Parliamentarians in 1642, '43, '44 and 45 - with the exception of one game as the Royalists against an Allied Parliamentarian-Scots Covenanter Army, but that been the extent of the participation of the other kingdoms in the struggle.

We use DBR rules and play 300 point games in 15mm on a 4' x 3' table using pre-set terrain. This is a departure from DBR's recommended table size and 'Preparing for Battle' terrain placement and is an innovation thought up by Keith McNelly at The Wargames Room http://thewargamesroom.wordpress.com/ Keith is a regular opponent of mine and a gentleman to boot - the breadth and depth of his wargaming interest is vast and he is also a real
contributor to out hobby, developing scenarios, organising competitions, actively promoting rules systems and welcoming newcomers. This little tweak to DBR has been a revelation- no more fluffing around before getting stuck into what most wargamers really want to do: pushing toy soldiers around and rolling dice.

We're now getting an enjoyable game inside 2 1/2 hours, which makes for a relaxing evening even if it is mid week and we have to go to work in the morning.

I've enjoyed limited success in my games and made some spectacular unforced errors - marching a column of Royalist cavalry across the face of Scottish cannon and then letting the survivors get charged and destroyed by the Scots Lancers being by far the worst.

Another of my regular opponents, Chris, has just moved out of town and will be sorely missed. Our games over the last few years have been great fun and no one could predict who would win. Chris has a great sense of humour and never took playing too seriously, just seriously enough to make our scraps entertaining and absorbing. On the good side, now I have an excuse for a holiday in his new home town

Jeff has recently started playing DBR in earnest and acquitted himself well as General Harbottle Grimstone, commanding a detachment of the New Model as they routed Sir Lancelot Periwinkle's cavaliers in an action in the environs of Much Snogworthy - this was a little known engagement battle fought prior to the decisive encounter at Naesby the following month. Harbottle's Ironsides rode down the Royalist Horse on his left flank and his infantry held their nerve and their ground despite the right giving way to a combination of galloper guns and cavalier charges. Jeff is another true gent and our games have been a pleasure.

I've been sketching out a little narrative to accompany this 'War Without an Enemy' featuring Grimstone, Periwinkle and Sir Henry Dudhop and others. We've yet to involve the Irish or the Scots, but, as I have armies to represent them it's only a matter of time before the war in England spills over into the other kingdoms. Over the summer I may write this up in more detail.

No photos of the toys soldiers in the battles I'm afraid, but here's a couple of others to be going on with.


New Model Pike Steeling Themselves For the Royalist Charge

Scots musketeers massacre my cavalry...