Monday 28 January 2013

Back on the Border...

I dug out the three QRF Ratels I bought over a year ago and cleaned up and assembled them this evening before spraying them with black car paint as an undercoat.

A remark by my regular gaming partner about how he'd enjoyed our AK 47 games set in Angola prompted me to do this. I've been thinking that I might put a bit of effort into this period over the next few weeks and see if I can rekindle some interest.

MRS01 Ratel 20

My models are a long way from looking like the one pictured above but it shouldn't be too hard to knock out something that's as good. I have plenty of Unimogs, Buffels, Elands, Landrovers and Centurions to take on the BTR 60s, T34s and T55s...

I'm thinking of a Angolan-Cuban invasion of Namibia in 1979, as a reaction to the South African raid on Cassinga in 1978 and as part of a wider communist offensive in Africa.

Not sure if we'll use the AK 47 rules off the peg or whether I'll go to the trouble of drafting scenarios. I probably won't - I think it's time to just get the little men and models on the table and start rolling dice...


Friday 25 January 2013

Royalist Defeat at Darrington: Borchester Secured!

Parliamentarian Ensign of  Fortescue's Troop of Horse


The bid by Herbert Gussett, Earl of Grantham, to seize Borchester and secure the county for the King has failed. Grantham's army was defeated at Darrington by the Parliamentarian forces led by Sir George Fortescue, who was mortally wounded in the battle.

The two armies encountered one another late on the 2nd October 1642 and, as the light faded, were drawn up in battle formation with only a quarter of a mile or so of open ground between them.

As night fell neither commander was willing to risk a night attack with such inexperienced troops so the two armies endured a cold a sleepless night keeping a wary eye on one another in the moonlight.

The Royalists were drawn up on the left of the picture below, their right flank anchored on the village of Darrington and their left on the woods in the background. They were deployed in conventional fashion with three regiments of foot in the centre and the cavalry on the wings, although their was little room for the latter to manoeuvre on either flank. Four troops of horse and company of dragoons were in the village and a further six troops were in a column on the extreme left by the woods.


Fortescue used the woods in the right foreground to secure his left flank, deploying a company of dragoons and three light guns in the trees. He lined up his four regiments of foot in the open ground beyond but, in a departure from convention placed six troops of horse, two of whom were his own lifeguard of cuirassiers, in the centre of his line. His open right flank was covered by another regiment of horse, six troops of harquebusiers in total.

As dawn broke Fortescue opted for a bold attack on the Royalist foot with his centrally placed cavalry. He had spotted a weak point at the juncture of two Royalist regiments and correctly surmised that there was an opportunity to break their line. Advancing at a steady trot the Parliamentary horse, maintained formation until they were almost upon the enemy infantry. The King's men discharged a volley but many of them fired too high and it had little effect. The Roundheads halted at the tips of the Royalist pikes and fired their pistols and carbines. The effect was devastating. The Royalist line buckled and Fortescue urged his men to press their advantage with the sword. 


Soon the Roundheads had hacked their way through the Royalist line, panic began to infect the King's men. Taking heart, the Parliamentary infantry steadily advanced and started to inflict heavy fire on the remaining Royalist foot.

On Grantham's left his cavalry, led by Colonel Dancy, managed to charge home and break Fortescue's cavalry, but it was a case of too little, too late. The Parliamentary foot stood firm and as Dancy tried to rally the Cavaliers the crisis in the centre overwhelmed Grantham's army. The Earl led his own troop in a last ditch attempt to beat back Fortescue's cuirassiers, and a company of musketeers came to his aid. Fortescue himself fell, struck by a musket ball that penetrated the open visor of his helmet, but at that very moment the Royalists reached breaking point and men began to thrown down their weapons and surrender.

The Royalist cavalry fled the field but there were too few Roundhead horse to pursue. Many of the King's foot were also able to slip away in the confusion. When the smoke cleared though over half the Royalist foot were dead, wounded or captured and only a thousand made it back to Felpersham, many of these without weapons.Losses amongst the horse were negligible but the blow to their morale was not.

On Parliament's side, although a regiment of horse had been put to flight, very few were casualties. The greatest losses were amongst Fortescue's  cuirassiers - half of whom were killed or wounded. Roundhead dead were fewer than a hundred though, and it was clear that victory was theirs.


In gaming terms Jeff's Parliamentarians broke my biggest command and won the game, just as my Royalists had broken his smaller command. We played with two commands each at 300 points using DBR rules and the 1642 Royalist and Parliament army lists. 

The result means that Borchester is secure, although the victorious Parliamentary troops (with the exception of the trained bands and the county militia who won't leave the locality) have been summoned by Essex as he seeks to being the King to battle. And, as we all know, that bid was to lead to the first major battle of the war at Edgehill later in October...

Tuesday 22 January 2013

Battle of Darrington October 1642

After their successful raid on the outlying villages of Borchester and victory in the skirmish at Ambridge the Royalists resolved to seize the initiative.

Colonel Dancy reported that the defences of Borchester would only get stronger, the manor houses of Perivale, Leyton Cross and Lakey Green are already garrisoned and earthworks have been prepared. Reports from Borchester indicate that the populace is working on reinforcing he medieval walls with earthen ditches and ramparts. Herbert Gussett, the Earl of Gantham, decides to act swiftly.

The Royalists have three regiments of foot at their disposal, each around 800 men strong, although a shortage of weapons means the ratio of muskets to pike is the obsolete 1:1. Grantham's own regiment of Whitecoats are reinforced by Sir Charles Marchmain's regiment and another regiment consisting of the Felpersham Trained Band. The Royalists strength however, is in the eleven troops of horse they have mustered, all of whom, with the exception of Grantham's lifeguard of cuirassiers, are trained to charge at the gallop in the Swedish fashion reserving fire until contact. In all Grantham has almost 3500 men, around a thousand of which are mounted.

Electing to approach Borchester as directly as possible, he reaches Darrington after a two day march where, to the Royalist's surprise, they are confronted by a Parliamentarian army blocking their path.

The Parliamentarian Governor of Borchester, Edward Dighurst, has hurriedly organised and concentrated his forces to meet the Royalist threat. The defeat and Ambridge was a salutary lesson - he is aware that his cavalry are no match for the Royalists in the open field - but he has no intention of sitting in half finished fortifications waiting for the King's men to attack. Sir George Fortescue, a veteran of the wars in the low countries has been appointed Sergeant Major General and will lead four regiments of foot and 12 troop of horse in the coming battle. Numerically the Parliamentary forces have parity with their enemies, although the infantry are better equipped. It is these men, including the redcoats of the Borchester Trained Band and Dighurst's own regiment of Yellowcoats that Fortescue will depend upon...

300 point game of DBR scheduled for tonight

Wednesday 16 January 2013

A Walk After Dark


'Tom, your on again tonight. Fighting patrol in platoon strength - probe as far as the Hacienda and engage any hostiles, hit 'em hard and get out fast. Get back before 0600. Password is "gintrap.". Leave a section behind but take an extra Gimpy.'

'Any word on enemy activity?'

'They've gone quiet. The SAS think the the Argies are losing their bottle - there seems to be the odd mining party out but no aggressive patrolling.'

Later...

'Not us again Corp...we were out last night...what's this patrol for?'

'It's the army Higgins, if we're sent on a patrol we're going on patrol, and that's it...there doesn't have to be a reason. Give Baz in 3rd section your rifle, you've got a Gimpy tonight.'

'What? Christ, they're heavy them things...'

'Shut it - or you'll be on point as well'

'Bloody hell...'

Tuesday 15 January 2013

Skirmish at Ambridge September 1642

The day after Prince Rupert clashed with Parliament's men at Powick Bridge, a much less well known encounter between the rival forces took place at Ambridge in Borsetshire.

A small but mobile Royalist force under the command of Colonel Rufus Dancy had spent the previous week cautiously probing the outlying villages and manor houses in the environs of Borchester. Some 700 strong, all of whom were mounted excepting 200 musketeers assigned as commanded shot, they had crossed the River Am south of Ambridge and raided Loxley Cross the day before. Dancy, a veteran of the wars on the Continent, now determined to head back to his base at Felpersham with a view to encouraging his patron the Earl of Grantham to march on Borchester without delay.


There remained however, the small problem of escaping the attention of Parliament's forces. The pillaging of Loxley Cross had been reported to the Parliamentary Governor in Borchester, Edward Dighurst, and almost a 1000 men of the town's garrison had marched out with a view to cutting off Dancy's retreat. Commanded by Colonel Nehemiah Dewhurst, nearly 600 mounted troops, supported by 400 musketeers of Dighurst's own regiment of yellowcoats, confronted Dancy south of Ambridge.


 Here the two forces can be seen facing one another at a distance of just under a quarter of a mile. It is nine o'clock in the morning of 24 September 1642, a warm, sunny, early autumn day.

The river Am, some fifty yards wide at this point runs from south to north. The road from Hollerton to  Ambridge runs to the west of the river and parallel with it. The Parliamentary forces are drawn up to the north, their cavalry deployed in the open fields on their right, with musketeers and dragoons across the Ambridge road and lining the hedges of the enclosed fields to their left.


The Royalists are not fully deployed, their cavalry, trained to reserve fire and to charge home at the gallop  in the Swedish fashion, are still forming up opposite the enemy horse. On their left, some 200 dragoons and 200 musketeers are preparing to advance on the Roundhead infantry in the enclosed fields.


The Royalists have the first bound and are eager to close with their foes. Their cavalry extends into line and presses forward at a steady trot, coming to a halt some 300 paces from the Parliamentary horse. On the right the musketeers and dragoons commence a steady advance. Dewhurst's men are similarly keen for a fight, their enthusiasm perhaps evidence of their inexperience. The horse move forward at a steady trot and fire a series of volleys with carbine and pistols at extreme range.


 The effect of the Parliamentary fire can be seen on the Royalist ranks. On the left their cavalry have suffered some disruption as the more inexperienced men flinch from the rebel fire. On the right there is an exchange between the musketeers and dragoons of both sides that again disrupts the Royalist formation.
Sensing the fight could go either way, Dancy seizes the initiative and exhorts his men to charge at the gallop. On his extreme left flank two troops of horse outflank their enemy while on the right his own troop of cuirassiers charge home where the Parliamentary line is at its thinnest.
The fight is short but fierce. The shock of the Royalist charge is everywhere successful in breaking the Roundheads with the exception of one troop that stubbornly fights on on the left of the Royalist line. Everywhere else the cavaliers are triumphant, although a lack of discipline does lead many to charge through the enemy ranks instead of wheeling to finish off their defeated foes.
Seeing their mounted comrades put to flight, many of the Parliamentary foot lose heart and throw up their hands in surrender.

There is little doubt about the result. Dancy has lost only a handful of men, largely to Parliamentary fire in the first few minutes of the fight, whilst Dewhurst flees the field with fewer than 200 of his cavalry and dragoons. As night falls another couple of hundred foot make their way in twos and threes to Ambridge, demoralised by their first taste of war. Some 400 mounted troops and half as many foot are unaccounted for, the majority wounded and prisoners of the Royalists, although it is feared their are several score dead.

The above is my first attempt at a 100 point DBR game on a 2" x 2" board in normal scale. The deployment zones are 150 paces from the flanks and 200 paces from the rear edges. The terrain is pre-set, as is the season, by the context of the campaign. Rolling for attacker and defender gives the defender the choice of which edge to choose as his base edge.

Their were 12 elements on the Parliamentary side defending (1 x Gen Pi (I), 6 x Pi (I), 4 x Sh (O), 1 x Dr (S)) against 10 Royalist (1 x Gen Pi(S), 5 x Pi(F), 2 xSh (O), 2 x Dr (O)). The game only lasted two bounds each with Parliament breaking on their second bound. I diced for post game casualties as per the suggestions on p27 of the DBR rules.

Immediate thoughts are this format has some potential. I may tweak the army lists a little as I doubt all Parliamentary dragoons were graded Superior at this stage of the war. Similarly I think their is scope to grade some of the shot as Inferior to reflect lack of training and equipment. It's too quick to make for a satisfying multi player game but played solo and written up during and after the game it makes for a relaxing afternoon. I have spent longer drafting this post than actually pushing tin and rolling dice though!

Monday 14 January 2013

17th Century County Warfare

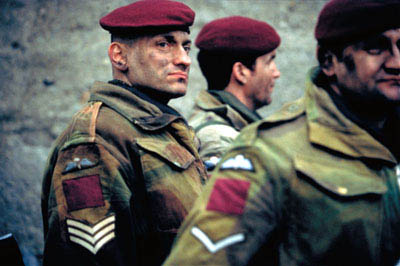
Herbert Gusset, the Earl of Grantham, rides out...

One idea I've had for this year's gaming is a British Civil Wars campaign. I have all the armies and plenty of terrain and a couple of regular opponents so it should be relatively easy to get something up and going.

I play this period using Phil Barker's DBR rules and like them. The reasons why are like them are expressed far better than I could do by Keith McNelly here: 


http://renaissancewargaming.wordpress.com/20-2/


Keith expands on one characteristic of this rule set in another article here: 


http://renaissancewargaming.wordpress.com/a-question-of-scale/


One of the distinguishing features of DBR is the option of playing in one of two scales. I believe the flexibility this brings to gaming is well suited to the civil wars in Britain where the vast majority of the engagements were skirmishes and sieges. As Keith points out:


Lets first consider the smaller points budgets, say 100 points. Using normal scale and such a points budget engagements between small armies of 1,000 to 1,500 men can be modeled... the first engagement of the English Civil War at Powick Bridge pitted some 1,000 Parliamentarian horse and dragoons against a similar number of Royalists.


And later on in the piece:


 A 400 point Royalist army I recently took to a competition in Australia would, in normal scale, represent an army of 2,800 foot, 900 horse and 200 dragoons. Using condensed scale this same army would represent 11,200 foot, 3,600 horse and 800 dragoons. 
However, DBR is not all about competition gaming. If we were to look at the New Model army at the battle of Naseby it comprised some 6,500 horse, 6,000 foot and 1,000 dragoons. This translates to some 40 stands of troops using condensed scale, or some 400 points. In normal scale over 170 stands would be required for the same army, a massive 1,500 points. Clearly the advantages of both scales are now becoming apparent.
So where does that leave us if we're planning a campaign? I tried using a slightly adapted version of this campaign system a couple of years ago: 
It's a gem of a system, adapted from the Wargames Foundry 1644 Rules for DBR. Alas, I lost enthusiasm quite quickly as I was playing out the campaign moves solo and tried fighting the battles that were generated both  solo and against real opponents and it simply didn't work for me. Firstly, I got bogged down in book keeping. Secondly, I found myself under pressure to do the book keeping during what were very busy weeks in readiness for a game at the weekend. This was neither relaxing nor motivating - I spend a fair chunk of my working life engaged in conflict and a  good deal of it on a computer or wading through paperwork, so you can imagine this wasn't much fun.
So, back to first principles. What are  the aims of a campaign? After all, I regularly and relatively frequently play British Civil War battles - what would a campaign add? For me, wargaming isn't about 'winning' and 'losing; rather it's more of being involved with an interactive history book, watching events unfold whilst having some influence over them - sending in a cavalry charge and seeing if it does break the enemy foot for example.
So, a campaign would have to add something to that interactive history book. Self evidently this would be a context for a battle in terms of its place in an unfolding narrative - why are these two forces fighting here at this particular point in time? 
Crucially, it would have to be fun as well. I can define this better by what it wouldn't be, rather than what it would be. I don't know much about campaigning but I know what I like...
  • Minimum bookeeping
  • The ability to generate games quickly and with little fuss but in the context of a wider narrative structure
  • Balanced games that can be played solo or with an opponent or two but which allow players to choose which side they are playing from game to game, so as to encourage the unfolding history book approach rather than it becoming a competitive event.
  • Something that provides an intellectually satisfying distraction from real life. 
The approach that best captures this philosophy is, for me, expressed brilliantly by Mark over at  Winter of 79, albeit in the context of a 20th Century conflict: www.winterof79.blogspot.com
The campaign is set in the fictional midlands county of Borsetshire (those of you who are familiar with the Radio 4 series The Archers will know this area well) and the approach is described as reflecting the fact
the world has moved on since the days of SPI's Wacht Am Rhine where you would spend months of your life pouring over maps and moving counters. Remember, for us Winter of '79 is a box within which to play our games and sometimes we just want to shake the box and see what ticket we pull out.
I like that...
Using this BBC map of Borsetshire Mark has 
placed our campaign arena within a national setting and local geographic context. We've given it key personages, major locations and strategic direction.
Now for the bookeeping part...

Without sweating over how many squaddies, tanks, guns, Garibaldi biscuits or tins of chicken supreme, we know that higher level command and operations are being directed from Felpersham. We've established there's a strong QRF, and a company base at Borchester that's a potential launching pad for smaller scale operations, or even a magnet for attack.

Does it actually matter how many men the Army has in Borsetshire, the composition, size of the population of Felpersham, number of roundabouts etc? No. Remember games are the goal not the detail. 
And
We don’t have fixed “armies” to do the paperwork on or keep in command radius on map as the whole thing is “virtual” and decided by chinese parliament. Do we really need to use much more than common sense and perhaps a d6 for randomness. If I say “well, I want a gunned up westland scout” its only fair (for sake of fun game) that somehow, Maff the 'Mad Trot' get a few rpgs/Laws or perhaps a Dushka type weapon. Op Sec? lets presume it cancels out and leaks happen on both sides. 

This is starting to look very attractive. The sharp eyed among you will see that there are even a couple of civil war battle sites on the above map at Ambridge itself and also at Francester.

So, here's a go at providing a background for a campaign set in our fictional English midlands county of Borsetshire on the Welsh Marches  starting in the summer of 1642, as King and Parliament start to raise armies.


According to Wikpedia http://en.wikipedia.org/wiki/Borsetshire , the two major towns in the county are the cathedral city of Felpersham in the east and the county town of Borchester roughly 17 miles to the west. Obviously, in the 17th Century there would be no railways and, for our purposes, the Felpersham canal doesn't exist either. The road network would be roughly similar, excluding the modern ring road at Borchester, although it would be made up of little more than rough tracks that would be well nigh impassable in the winter months. The river Perch and river Mercer are navigable to to barge traffic.


Borchester is the commercial and adminstrative centre of the county and the local notables, led by a cabal of merchants and minor gentry of godly protestant persuasion, are for Parliament. There is a local trained band in the town and a limited supply of weapons and ammunition in the county magazine.


Felpersham is the seat of the Anglican Bishop, and the governing class, led by the landowning gentry, are for the King. The Lord Lieutenant is the Earl of Grantham, Herbert Gusset, who has extensive lands in the county but rarely visits it. The Royalists see Borsetshire as being of some  value given it's proximity to the recruiting grounds of Wales, and the fact it sits astride the so called 'King's Way' from the principality to Oxford, a city where he enjoys great support and which will become his headquarters. It's strategic significance is further underlined by its location on the north-south axis from the midlands and north west England to the gateway to the West Country at Gloucester.


By September 1642 however the King is still in Shrewsbury, to the north, recruiting and raising funds for arms. The Parliamentarian field army under the Earl of Essex is marching on Worcester and a sharp skirmish, the first of the war, has just taken place at Powick Bridge between Prince Rupert's cavalry and that of Parliament.

In Borsetshire, several troops of horse, together with some dragoons and commanded shot have marched from Felpersham and crossed the Am at Ambridge. They are probing and scouting the defences of Borchester with a view to assessing whether an attempt can be made to storm the town. 


The leader of the Parliamentarian forces in Borsetshire is Edward Dighurst. who has already raised his own regiment of foot to reinforce the Borchester Trained Band and who has enlisted the services of one Alastair Begby, a Scottish veteran of the wars in Germany, and an experienced engineer. The medieval defences of Borchester are being strengthened with earthworks and the Parliamentarians are also seeking to fortify manor houses at Perivale, Leyton Cross and Lakey Green. Word of Royalist troops to the south of the town leads Dighurst to send forth a detachment of horse and commanded shot to see if he can seize the river crossing at Ambridge at cut the King's men off from Felpersham.


On 24 September, the day after the opening action of the war at Powick Bridge, the little known skirmish at Ambridge takes place.


Friday 11 January 2013

Production Norms Have Been Exceeded

All modeled  and painted in the last three weeks...

20 mm Scimitar complete with Lt Algernon Ffosket-Symthe looking at a map

The Blue Regiment

The Yellow Regiment

Argie Bazooka Team

Downed British chopper pilot with officer and two SAS types fighting their way back to San Carlos..

Engagement at Crossmaheart 1649


Being an account of a little known encounter between a detachment of the New Model Army led by the redoubtable Harbottle Grimstone and an allied force of Malignants and Irish Rebels under the joint command of Sir Lancelot Periwinkle and James O'Dowd.


The Irish Confederate Army numbered some 3600 foot and just over 500 horse. There were also three demi-culverins at the disposal of the rebels. The foot were a mixed bag of Irish and English, the latter being the better equipped. Around 800 of the Irish foot, the so called Antrim Redshanks, lacked muskets and would rely on the shock of their charge and their ferocity with sword and axe to break the opposition.


The New Model deployed around 700 horse and 1800 foot, although the disparity in numbers compared to their enemies was offset in part by a the large number of guns, both light and heavy pieces, totaling 15 in all. There were also two companies of dragoons available to Grimstone.


A view of the battlefield. The Irish Confederates deployed on the left, their flank protected by a marsh. The English front line ran roughly along the road that emerged out of the wooded hills in the background.


In the above picture the New Model can be seen deployed on the right. In the background they have refused a flank, although the dragoons have been sent forward to harass the advancing Irish. In the foreground the Ironsides are standing firm as the English Royalist horse, supported by commanded shot, advances at an angle towards them.

The first crisis of the battle came when the Royalist cavalry charged the Ironsides, who stood their ground and then counter charged, sweeping all before them. The losses were heavy on both sides however, and Harbottle was unable to get his cavalry to press their advantage.

Meanwhile, the massed Irish foot were slowly advancing on the New Model’s right flank. All the while they were enduring a brisk fire from the dragoons Harbottle had sent forward and the artillery that had been deployed well back from the road to Crossmaheart. The successful conclusion of the fight on the New Model’s left allowed Grimstone to manaouvre a regiment of foot to enfilade the oncoming Irish infantry, and this, coupled with the losses they had endured thus far, was enough to break the resolve of the Confederate army.


Here we can see in the foreground  the New Model outflanking the Irish foot whilst Grimstone’s gonnes thin the ranks of the Redshanks in the background.

In other words, my first game of the year ended in defeat as Jeff’s New Model Army saw off my Irish Confederates. Sitting back and forcing me to trundle across the battlefield in the face of all that artillery proved a masterstroke.

Armies were DBR 300 pts  played on a 4” X 3” battlefield.


Thursday 10 January 2013

Projects for 2013


Had a bit of a think about this year's gaming projects.

With my most frequent opponent leaving town, and there being no end in sight to the time I spend away from home with work, I think that I have to be realistic about what can be achieved.

This blog started out as a bit fo fun to help provide a narrative to a campaign I envisaged focusing on the War in Angloa 1975-89. There is still lots to do with that project as we've only reached 1976 and I have just about all the figures and vehicles I need to play out the battles I imagine that will form the story as it unfolds. I should pause to celebrate what I've done so far as this was a major project, involving the collection and painting of the protagonists and all the terrain to go with it.

Interestingly, as I started to play out the battles I found my enthusiasm waning for the subject. Perhaps I'd just spent too much time and effort on too narrow a topic? 

The other issue is that I still have sorted out the matter of which rules I prefer for this period. I've tried AK 47 Reloaded and then adapted Cold War 83 and most recently have bought a copy of Force on Force. I suspect that what I need to do is persevere with a particular set for some time until I get really familiar with them so I'm not tempted to flit off and try something else and risk never settling on anything.

The Falklands 1982 proved a  pleasant diversion from Angola, allowing me to relive parts of my youth. I've finished painting most of the figures I bought, there are a few British Marines I need to do, and few more to buy so I have roughly a platoon to play with. The Paras, SAS/SBS Argentine Army, Marines  and Special Forces are all done. There are one or two items of terrain I'd like to have a go at, specifically a generic farmhouse to be an objective for one of my scenarios and some marshes. I also have a Gazelle and a UH-1 Helicopter to model and paint. I'm pretty settled on Cold War 83 as a rule set coupled with the scenarios and army lists I've adapted from Rules of Engagement.


The other  aspects of this conflict I'm looking forward to playing out are the air and naval  dimensions. I've bought a pile of 1/600 aircraft from Tumbling Dice and a couple of  1/3000 fleets from Skytrex which shouldn't be too much trouble to paint up. This, I suspect, will form the focus of my modelling and painting for the first half of this year. The rules are sorted, as I found an adaptation of the old Seastrike rules on the web which are easily refined for the Falklands and should be good fun - not too complex but realistic enough to allow one to suspend disbelief.


My other two periods are the British and Russian Civil Wars. I have plenty of figures and vehicles for the latter - extending to an armoured train, tanks, armoured cars and trucks that look like they could barely cope with the East Lancs road never mind the rigours of the Russian steppe...The terrain isn't too bad although a good honest look at it has made me decide that this will be a bit of a priority this year. I have no way of representing Russian terrain in winter which seems stupid given that that it's the winter that is largely the point of difference in Russia. I've just got hold of a Russian railway station and a water tower from Peter Pig (the latter is from the American West range - I'm unsure how water towers coped with a Siberian winter...) and will sort out a cloth to represent a snow covered landscape. That leaves some pine trees to organise - I have some somewhere although they'll need basing. I've been using generic farm buildings that could be be from anywhere from Smolensk to Dartmoor so maybe I should get hold a few with a bit more Russian character. I have a lovely church with copper onion dome so it won't take much to sort out a good table.

What I actually do with this stuff is a bit moot. The Falklands figures and terrain are all set to be played in a series of linked scenarios that will form a campaign almost by default. The Russian Civil War lends itself to an 'axis of advance' style of campaign as most of the fighting was along corridors defined by the railways. All I really need to do is get the little blighters on the table and start rolling dice. This can be a bit of an effort sometimes - I'm starting to see the advantage of smaller tables and smaller games with commensurate short set up and pack away times.

Which leads me into what is still my favourite period - the British Civil Wars of the 17th Century. I can field all the major (and the minor come to think of it) protagonists, and have plenty of good looking terrrain. I have a couple of regular opponents and I enjoy playing the DBR rules. I know many will disagree with me but I think Phil Barker has done a great job with these rules capturing the subtleties of the period - I don't care if I win or lose as each game I play is, to quote Phillip Sabin, an 'interactive history book'. And in the 300 pt, 4 x 3 ft table format it's a doddle to set up and play in an evening.


One thought I have had is to develop a free form campaign - a sort of 17th Century Winter of 79  ('Winter of 49'?). Given that the major set piece battles involving large numbers were the result of several field armies on both sides coming together and given that much of the war consisted of the minor engagements, skirmishes and sieges of so called county warfare I think there is potential to do something here. I've been reading John Barratt's account of the war in Cheshire (The Great Siege of Chester: History Press 2011) and have a yen to develop a narrative based on a fictional county similar to Cheshire that would allow me to develop a few of the characters I've started to write about on this blog as well as provide a structure to the games I play. I'll work this idea up for a future post.

Wednesday 2 January 2013

Ireland 1649...

Mercurius Politicus this Seventh Day of February 1649 A.D.

Newes from Ireland that the malignant Ormonde hath made his peace with the Papist host and that the malignants Periwinkle and Dudhope hath made their way to Dublin town. and are getting arms and men to make mischief against the Common Weal...

news9a_0

'Hell's teeth Periwinkle! Where in the name of God does one find a decent flagon of wine in this accursed country?'

'Hold fast Sir, we have been here but a week and their is much work to be done...'

'And no drinke to be had alas!'