Chris and I had a game of DBR on Sunday. It was a 300 pointer on a 3 x 4 foot table - a bit of a practise for the forthcoming Harquebusiers & Hussars gathering that the indefatigable Keith McNelly organises.
Chris played Montrose, leading an army of Scots Royalists against my Covenanters in 1645. The terrain was pre-set but as Chris was the defender he got to choose which side of the table he would deploy on. He wisely chose the table edge with two closed flanks, a wood and a steep hill, leaving me to deploy with an open flank.
This meant he could do what Montrose and McColla do best - a head on frontal attack (in DBR the fact you're the 'defender' doesn't stop you taking the offensive tactically). I anticipated this and opted to greet his massed warband and fast shot with a line of frame guns and then massed ranks of shot deployed in depth.
In the picture above the Covenant are in the foreground with the frame guns on the left enfilading the McColla's Irish foot as they charge in. A couple of hundred Irish have swung away from the main body to get to close quarters with their tormentors- the attackers they are about to die gloriously in the face of grape shot. To the right the massed Highlanders are advancing on the Covenanter position.
Whilst the Covenant eventually fought Montrose's Highlanders to a standstill,l the Irish Brigade hit the defenders at the boundary between their two commands - McColla himself, accompanied by 200 of his best men led the charge through the Covenanter ranks and fell upon the baggage train. The screams of Covenanter merchants and their wives rent the air and led to a thundering collective nervous breakdown in the ranks of Hodden Grey.
It was a close run thing - Montrose was only an element from breaking - but victory went to the Scots Royalists....
Wargaming an alternative timeline to the war in Angola 1975-89, the Falklands War 1982, the British Civil Wars 1639-51 and the Russian Civil War 1917-21
Showing posts with label DBR. Show all posts
Monday, 4 August 2014
Thursday, 12 September 2013
Fight at St Johns Parva September 1643
For this little battle I decided to do something slightly different. Readers who play English Civil War games will be aware that the Royalist armies often had a greater proportion of cavalry than their opponents. Phil Barker goes as far as to say that in some cases their forces were often cavalry supported by commanded shot. Parliamentary armies, at least until the formation of the New Model, tended to have a better balance of horse and foot but, with certain notable exceptions (Haselrig's 'Lobsters' and the Eastern Association horse being two), their cavalry was often of an inferior quality.
Our campaign has arrived at a point in late 1643 where the main field armies of both sides are engaged in the manoeuvrings that culminated in the First Battle of Newbury. Much of the Royalist cavalry and the best of the infantry from Borsetshire are serving with the King. Felpersham, the Royalist stronghold and county town is looking vulnerable - there aren't enough troops to man its extensive fortifications and earthworks.
Parliamentarians in the county have mounted a scratch offensive to try and seize Felpersham by coup de main, and their little army marched on the town from the north west, moving quickly without baggage or heavy artillery. Sir Charles Moncrief, acting Royalist commander, sensed the danger and responded quickly. He marched out of Felpersham, also without baggage and heavy guns, with a force comprising local militia and what mounted troops he could muster.
The Royalist Army was therefore an unusual one - a mere 400 horse and 200 dragoons but supported by nearly 3000 foot - in other words a reversal of the usual proportions of foot and horse. The foot suffered from a shortage of muskets. such that the ratio of shot to pike was 1:1.
Parliament by contrast fielded 1100 horse, mainly 'trotters' trained to caracole, and fewer infantry than their opponents but with twice as many shot as pike.
The battle that followed was remarkable for the Royalists' lack of ability to force a decision - their usual offensive arm was weak and accordingly what followed was, to paraphrase a later general of the horse and musket era a 'long hard pounding'.
Full AAR to follow
Our campaign has arrived at a point in late 1643 where the main field armies of both sides are engaged in the manoeuvrings that culminated in the First Battle of Newbury. Much of the Royalist cavalry and the best of the infantry from Borsetshire are serving with the King. Felpersham, the Royalist stronghold and county town is looking vulnerable - there aren't enough troops to man its extensive fortifications and earthworks.
Parliamentarians in the county have mounted a scratch offensive to try and seize Felpersham by coup de main, and their little army marched on the town from the north west, moving quickly without baggage or heavy artillery. Sir Charles Moncrief, acting Royalist commander, sensed the danger and responded quickly. He marched out of Felpersham, also without baggage and heavy guns, with a force comprising local militia and what mounted troops he could muster.
The Royalist Army was therefore an unusual one - a mere 400 horse and 200 dragoons but supported by nearly 3000 foot - in other words a reversal of the usual proportions of foot and horse. The foot suffered from a shortage of muskets. such that the ratio of shot to pike was 1:1.
Parliament by contrast fielded 1100 horse, mainly 'trotters' trained to caracole, and fewer infantry than their opponents but with twice as many shot as pike.
The battle that followed was remarkable for the Royalists' lack of ability to force a decision - their usual offensive arm was weak and accordingly what followed was, to paraphrase a later general of the horse and musket era a 'long hard pounding'.
Full AAR to follow
Wednesday, 11 September 2013
Borsetshire September 1643
We left the war in Borsetshire in stalemate in late May 1643, with the Royalist forces based in Felpersham, and their Parliamentary opponents controlling Borchester, the other major town in the county.
The drawn battle of Ashby Street had, as predicted, proved a strategic setback for the Roundheads, as their scheme to invest Felpersham by occupying the villages around the city had been thwarted.
During the early summer there was little fighting, aside from the odd skirmish as opposing patrols of dragoons or cavalry encountered one another in the villages between the two major settlements.
In June 1643 the Royalist commander in the county, the Earl of Grantham, received orders from Prince Rupert to muster all the Royalist cavalry and best of the infantry in Borsetshire and to join the King's offensive that culminated in the storming of Bristol the following month.

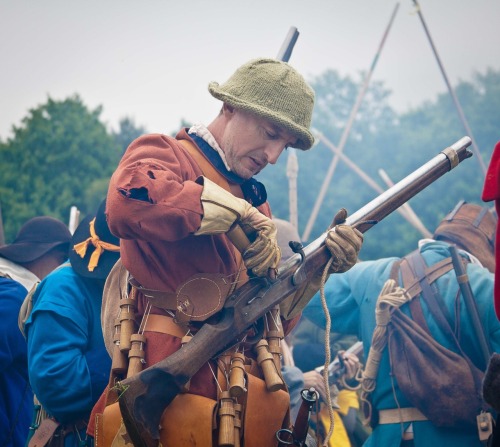
A Parliamentary Dragoon prepares his carbine whilst in the background pikemen prepare to fight
The garrison of Felpersham was thus reduced to largely local militia, whose terms of service meant they would not leave the county. Sensing an opportunity whilst the King's main field army pursued the Earl of Essex after the relief of Gloucester, the Borsetshire Parliamentarians decided to march on Felpersham once more.
The harvest was in and the Roundheads were on the march as the local Royalist commander, Sir Charles Moncrief, weighed up his options. His problem was that were not enough troops to man the fortified villages and earthworks that protected Felpersham without the absent regiments that were fighting with the King. He did know however, the direction of the Roundhead thrust, thanks to intelligence from his scouts.
Accordingly, in mid September of 1643 Moncrief led his men to meet the Roundhead advance. The subsequent battle was fought near the village of St Johns Parva.
A game of DBR is scheduled for this evening
The drawn battle of Ashby Street had, as predicted, proved a strategic setback for the Roundheads, as their scheme to invest Felpersham by occupying the villages around the city had been thwarted.
During the early summer there was little fighting, aside from the odd skirmish as opposing patrols of dragoons or cavalry encountered one another in the villages between the two major settlements.
In June 1643 the Royalist commander in the county, the Earl of Grantham, received orders from Prince Rupert to muster all the Royalist cavalry and best of the infantry in Borsetshire and to join the King's offensive that culminated in the storming of Bristol the following month.

A Parliamentary Dragoon prepares his carbine whilst in the background pikemen prepare to fight
The garrison of Felpersham was thus reduced to largely local militia, whose terms of service meant they would not leave the county. Sensing an opportunity whilst the King's main field army pursued the Earl of Essex after the relief of Gloucester, the Borsetshire Parliamentarians decided to march on Felpersham once more.
The harvest was in and the Roundheads were on the march as the local Royalist commander, Sir Charles Moncrief, weighed up his options. His problem was that were not enough troops to man the fortified villages and earthworks that protected Felpersham without the absent regiments that were fighting with the King. He did know however, the direction of the Roundhead thrust, thanks to intelligence from his scouts.
Accordingly, in mid September of 1643 Moncrief led his men to meet the Roundhead advance. The subsequent battle was fought near the village of St Johns Parva.
A game of DBR is scheduled for this evening
Sunday, 2 June 2013
Battle of Ashby Street May 1643 AAR
The idea was to play out an encounter battle as described in the narrative leading up to the game. We used the following modification to the standard DBR deployment rules on a 4" x 3" table with 300 point armies.
n.b. Artillery (O) and (S) without teams cannot deploy and are discarded although they count towards command and army total ME for purposes of break points.
My long suffering regular opponent Keith had some misgivings about this scheme, as he argued it would encourage ahistorical formations marching on the table. I didn't think this would be too much of an issue as even with a PIP die of 1, any command marching on good going could deploy in at least two groups, using the command's general's 'free' PIP...
At it happened I think we were both correct and all the deployment did was negate the advantage of the 4" x 3" table, that is we ended up fluffing around before closing with one another.
Here are the armies as deployed after a bound each. Apologies for the poor photo. The Roundheads are deployed in the background, very sensibly choosing to position two regiments of foote on the hill and anchoring their left flank on the enclosures by lining the hedges with dragoons and placing what artillery had managed to stay with Edward Dighurst's little army during the approach march across the road. The Royalist army is largely mounted, with only 8 elements of commanded shot not on horseback. They've deployed in a conventional style with the cavalry on the wings and the shot in the centre. A couple of elements of dragoons have entered the enclosed fields in the lower right of the photo.
In the above picture the Royalist shot have advanced to the foot of the slope and, having subjected the Roundhead infantry to withering volleys of musketry, have drawn their enemy off the hill. Unfortunately for the King's men, the Roundheads have also trotted forward their pistoleers who are caracoling in front of the Royalist musketeers. The Royalists have brought up a couple of troops of horse to try and bolster their infantry.
It wasn't long before the Royalist centre broke, but the Roundheads had taken a pounding on their right flank and it too broke. The Royalist army, its morale on the verge of breaking, had no hope of victory. It did have a slim chance of seizing something from the defeat though as one of the peculiarities of DBR is the so called 'revenge bound' i.e. a command breaks when it has lost one third of it's 'morale equivalents' at the start of any of its bounds or the end of the game (my emphasis).
And so it was that a final desperate charge by a company of dragoons and two troops of cavaliers took the Roundhead guns and got amongst their baggage train. The result was both armies broke simultaneously and streamed from the field.
The fight had been bloody but the overall casualties were light as neither side rode down their fleeing enemy for the simple reason they were pre-occupied with their own flight!
Tactically it was a drawn battle, but the destruction of the Roundhead guns meant their strategic purpose was defeated. Without heavy ordnance their was little hope of a successful investment of Felpersham...
And so, as spring 1643 gave way to summer in Borsetshire, matters seemed to be at something of an impasse.
That is, until the Earl of Grantham received a messenger frorm Oxford who had ridden on the orders of none other than Prince Rupert...
No elements are deployed on table.
No ambushes.
Invader enters from anywhere on long table edge on first bound (all baggage is classed as (I) and mobile). PIPs must be used to maximise entry of elements onto the table i.e. no second march moves until all elements are deployed
Defender enters from anywhere on opposite long table edge on subsequent bound (all baggage is classed as (I) and mobile). PIPs must be used to maximise entry of elements onto the table i.e. no second march moves until all elements are deployed
If PIPs do not permit whole of army to enter on first bound, PIPs in subsequent bounds must be used to enable elements to enter table until whole army is on table. Elements not arriving in the first bound are assumed to be straggling and do not arrive until their command is allocated a PIP die score of 6, when they must do so or be lost.
My long suffering regular opponent Keith had some misgivings about this scheme, as he argued it would encourage ahistorical formations marching on the table. I didn't think this would be too much of an issue as even with a PIP die of 1, any command marching on good going could deploy in at least two groups, using the command's general's 'free' PIP...
At it happened I think we were both correct and all the deployment did was negate the advantage of the 4" x 3" table, that is we ended up fluffing around before closing with one another.
Here are the armies as deployed after a bound each. Apologies for the poor photo. The Roundheads are deployed in the background, very sensibly choosing to position two regiments of foote on the hill and anchoring their left flank on the enclosures by lining the hedges with dragoons and placing what artillery had managed to stay with Edward Dighurst's little army during the approach march across the road. The Royalist army is largely mounted, with only 8 elements of commanded shot not on horseback. They've deployed in a conventional style with the cavalry on the wings and the shot in the centre. A couple of elements of dragoons have entered the enclosed fields in the lower right of the photo.
In the above picture the Royalist shot have advanced to the foot of the slope and, having subjected the Roundhead infantry to withering volleys of musketry, have drawn their enemy off the hill. Unfortunately for the King's men, the Roundheads have also trotted forward their pistoleers who are caracoling in front of the Royalist musketeers. The Royalists have brought up a couple of troops of horse to try and bolster their infantry.
It wasn't long before the Royalist centre broke, but the Roundheads had taken a pounding on their right flank and it too broke. The Royalist army, its morale on the verge of breaking, had no hope of victory. It did have a slim chance of seizing something from the defeat though as one of the peculiarities of DBR is the so called 'revenge bound' i.e. a command breaks when it has lost one third of it's 'morale equivalents' at the start of any of its bounds or the end of the game (my emphasis).
And so it was that a final desperate charge by a company of dragoons and two troops of cavaliers took the Roundhead guns and got amongst their baggage train. The result was both armies broke simultaneously and streamed from the field.
The fight had been bloody but the overall casualties were light as neither side rode down their fleeing enemy for the simple reason they were pre-occupied with their own flight!
Tactically it was a drawn battle, but the destruction of the Roundhead guns meant their strategic purpose was defeated. Without heavy ordnance their was little hope of a successful investment of Felpersham...
And so, as spring 1643 gave way to summer in Borsetshire, matters seemed to be at something of an impasse.
That is, until the Earl of Grantham received a messenger frorm Oxford who had ridden on the orders of none other than Prince Rupert...
Saturday, 18 May 2013
Great Slaughter at Ashby Street
Felpersham May 1643

Thomas Fletcher, printer's apprentice and Parliamentarian sympathiser, has learned to keep his political beliefs to himself this past year, given that he lives and works in a city that has declared for the King.
A few days ago there was much talk in the taverns of the Roundhead army's excesses in the villages near Felpersham, some not five miles from the city walls. Only three mornings ago he witnessed more than a thousand cavaliers leave the city by the Fishergate, followed by a lesser number of foot, all of them musketeers, clad in the blue uniforms of the Earl of Grantham's lifeguard and the yellow coats of Sir Charles Moncrief's regiment of foote.
Now many of those horseman are lying broken and bleeding in the City's hospital, a former convent that passed into the Earl of Grantham's estate in the reign of Elizabeth.
Fletcher drinks in 'The Golden Pheasant', a tavern off Pudding street, and one frequented by Moncrief's men. There he strikes up a conversation with one of the musketeers who marched out of Felpersham to fight the Roundheads.
That night he writes by candlelight of what he has learnt and in the morning passes it to a man he knows only as Master Nuttall, a travelling peddler, who seems much troubled this day.
The gist of Fletcher's report, for that is what it is considered by the Parliamentarian Scoutmaster General, is thus: there was a great slaughter of Royalists at Ashby Street and many gallant men fell but just as the battle seemed lost and the King's army appeared broken, a few score cavaliers and dragoons fell upon the Roundhead artillery train and baggage. The Roundhead guns were spiked and their baggage train sacked, the powder and shot blown up, and the treasure pillaged.
The King's cavalry have been dealt a great blow, it will be many months before his supporters could consider going over to the offensive, but equally it appears that Parliament's men have lost their siege train and with it the means to force a decision in the county...
Full DBR After Action Report to Follow

Thomas Fletcher, printer's apprentice and Parliamentarian sympathiser, has learned to keep his political beliefs to himself this past year, given that he lives and works in a city that has declared for the King.
A few days ago there was much talk in the taverns of the Roundhead army's excesses in the villages near Felpersham, some not five miles from the city walls. Only three mornings ago he witnessed more than a thousand cavaliers leave the city by the Fishergate, followed by a lesser number of foot, all of them musketeers, clad in the blue uniforms of the Earl of Grantham's lifeguard and the yellow coats of Sir Charles Moncrief's regiment of foote.
Now many of those horseman are lying broken and bleeding in the City's hospital, a former convent that passed into the Earl of Grantham's estate in the reign of Elizabeth.
Fletcher drinks in 'The Golden Pheasant', a tavern off Pudding street, and one frequented by Moncrief's men. There he strikes up a conversation with one of the musketeers who marched out of Felpersham to fight the Roundheads.
That night he writes by candlelight of what he has learnt and in the morning passes it to a man he knows only as Master Nuttall, a travelling peddler, who seems much troubled this day.
The gist of Fletcher's report, for that is what it is considered by the Parliamentarian Scoutmaster General, is thus: there was a great slaughter of Royalists at Ashby Street and many gallant men fell but just as the battle seemed lost and the King's army appeared broken, a few score cavaliers and dragoons fell upon the Roundhead artillery train and baggage. The Roundhead guns were spiked and their baggage train sacked, the powder and shot blown up, and the treasure pillaged.
The King's cavalry have been dealt a great blow, it will be many months before his supporters could consider going over to the offensive, but equally it appears that Parliament's men have lost their siege train and with it the means to force a decision in the county...
Full DBR After Action Report to Follow
Thursday, 16 May 2013
Fight at Ashby Street

Ashby Street is a small village five miles due east of Felpersham in Borsetshire. In the spring of 1643 it was the scene of a battle between Parliamentarian forces led by Edward Dighurst and a Royalist army under the command of the Earl of Grantham.
The Parliamentarians were seeking to secure the villages and towns around Felpersham, the main Royalist base in the county, in order to invest the city. A skirmish between Parliamentarian dragoons led by Captain Harbottle Grimstone and a detachment of cavaliers under the command of Charles Marchmain preceded the main battle.
The clash was was one that modern military professionals would describe as an 'encounter battle', both sides having liiterally 'marched to the sound of the guns' on hearing of the skirmish between Harbottle and Marchmain's forces, and deployed off that march to fight.
In other words a game of DBR is scheduled for this weekend...
Monday, 15 April 2013
Battle of Hazelhurst 1 February 1643 AAR
It's taken me a while to write this up - a combination of being busy at work and a bit of a dip in enthusiasm for blogging and modelling this last couple of weeks, although I've been doing a fair amount of reading and thinking about my various campaigns and periods...
Anyway, readers will recall that the Royalists had embarked on a winter offensive in Borsetshire in early 1643. They successfully manoeuvred around the outlying Roundhead defences of Borchester and were poised to attack the town from the north, an aspect where the defences were uncompleted but first had to force a crossing of the river Perch on the Hazelhurst road.
Parliament's men had marched out to meet them and after a cold night out in the field the scene was set for a battle.
Keith played the Parliamentary commander and had at his disposal a fair amount of artillery, including medium and light pieces, a couple of regiments of infantry and some harqubusiers which, as we were playing DBR, were graded inferior. His strength was the artillery, which meant he could sit back and bombard the Royalists with impunity (they had no artillery at all) until they were forced to attack. His other advantage was the river, which ran across the battlefield and which the Royalists would have to cross the close with his army. There was just one bridge and the state of the river was unknown at the beginning of the fight.
Armies were 300 pts each and we played on a 4' x 3' table. We diced for who would be the defender (in DBR this determines who deploys first and, under our house variation, who gets to choose which table edge they deploy in front of). I ended up with the lower score so chose the side of the table that gave me the hill, merely to deny it to the Roundheads, and lined up in conventional style with the cavalry on the flanks in readiness for an advance on a broad front. I had some dragoons and cavalry positioned on the road ready to try and seize the bridge.
Anyway, readers will recall that the Royalists had embarked on a winter offensive in Borsetshire in early 1643. They successfully manoeuvred around the outlying Roundhead defences of Borchester and were poised to attack the town from the north, an aspect where the defences were uncompleted but first had to force a crossing of the river Perch on the Hazelhurst road.
Parliament's men had marched out to meet them and after a cold night out in the field the scene was set for a battle.
Keith played the Parliamentary commander and had at his disposal a fair amount of artillery, including medium and light pieces, a couple of regiments of infantry and some harqubusiers which, as we were playing DBR, were graded inferior. His strength was the artillery, which meant he could sit back and bombard the Royalists with impunity (they had no artillery at all) until they were forced to attack. His other advantage was the river, which ran across the battlefield and which the Royalists would have to cross the close with his army. There was just one bridge and the state of the river was unknown at the beginning of the fight.
![]() |
| The snow covered battlefield with the Royalists in the foreground |
Friday, 25 January 2013
Royalist Defeat at Darrington: Borchester Secured!
![]() |
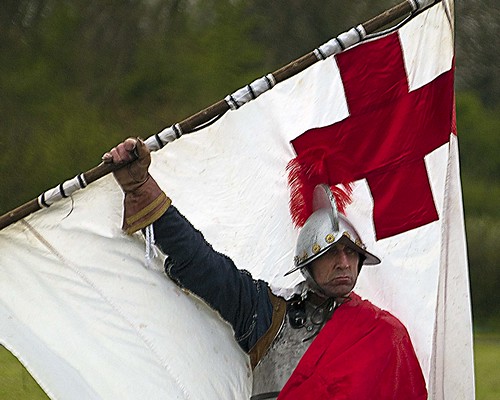
| Parliamentarian Ensign of Fortescue's Troop of Horse |
The bid by Herbert Gussett, Earl of Grantham, to seize Borchester and secure the county for the King has failed. Grantham's army was defeated at Darrington by the Parliamentarian forces led by Sir George Fortescue, who was mortally wounded in the battle.
The two armies encountered one another late on the 2nd October 1642 and, as the light faded, were drawn up in battle formation with only a quarter of a mile or so of open ground between them.
As night fell neither commander was willing to risk a night attack with such inexperienced troops so the two armies endured a cold a sleepless night keeping a wary eye on one another in the moonlight.
The Royalists were drawn up on the left of the picture below, their right flank anchored on the village of Darrington and their left on the woods in the background. They were deployed in conventional fashion with three regiments of foot in the centre and the cavalry on the wings, although their was little room for the latter to manoeuvre on either flank. Four troops of horse and company of dragoons were in the village and a further six troops were in a column on the extreme left by the woods.
Fortescue used the woods in the right foreground to secure his left flank, deploying a company of dragoons and three light guns in the trees. He lined up his four regiments of foot in the open ground beyond but, in a departure from convention placed six troops of horse, two of whom were his own lifeguard of cuirassiers, in the centre of his line. His open right flank was covered by another regiment of horse, six troops of harquebusiers in total.
As dawn broke Fortescue opted for a bold attack on the Royalist foot with his centrally placed cavalry. He had spotted a weak point at the juncture of two Royalist regiments and correctly surmised that there was an opportunity to break their line. Advancing at a steady trot the Parliamentary horse, maintained formation until they were almost upon the enemy infantry. The King's men discharged a volley but many of them fired too high and it had little effect. The Roundheads halted at the tips of the Royalist pikes and fired their pistols and carbines. The effect was devastating. The Royalist line buckled and Fortescue urged his men to press their advantage with the sword.
Soon the Roundheads had hacked their way through the Royalist line, panic began to infect the King's men. Taking heart, the Parliamentary infantry steadily advanced and started to inflict heavy fire on the remaining Royalist foot.
On Grantham's left his cavalry, led by Colonel Dancy, managed to charge home and break Fortescue's cavalry, but it was a case of too little, too late. The Parliamentary foot stood firm and as Dancy tried to rally the Cavaliers the crisis in the centre overwhelmed Grantham's army. The Earl led his own troop in a last ditch attempt to beat back Fortescue's cuirassiers, and a company of musketeers came to his aid. Fortescue himself fell, struck by a musket ball that penetrated the open visor of his helmet, but at that very moment the Royalists reached breaking point and men began to thrown down their weapons and surrender.
The Royalist cavalry fled the field but there were too few Roundhead horse to pursue. Many of the King's foot were also able to slip away in the confusion. When the smoke cleared though over half the Royalist foot were dead, wounded or captured and only a thousand made it back to Felpersham, many of these without weapons.Losses amongst the horse were negligible but the blow to their morale was not.
On Parliament's side, although a regiment of horse had been put to flight, very few were casualties. The greatest losses were amongst Fortescue's cuirassiers - half of whom were killed or wounded. Roundhead dead were fewer than a hundred though, and it was clear that victory was theirs.

In gaming terms Jeff's Parliamentarians broke my biggest command and won the game, just as my Royalists had broken his smaller command. We played with two commands each at 300 points using DBR rules and the 1642 Royalist and Parliament army lists.
The result means that Borchester is secure, although the victorious Parliamentary troops (with the exception of the trained bands and the county militia who won't leave the locality) have been summoned by Essex as he seeks to being the King to battle. And, as we all know, that bid was to lead to the first major battle of the war at Edgehill later in October...
Labels:
Borsetshire Campaign,
British Civil War,
DBR
Sunday, 16 December 2012
Fiddler's Bottom AAR
Fiddler's Bottom: the village is at the top of the picture - the Scots attacked from the right - if you look carefully you can just make out the deployment zones of the two sides marked with dice. We played 300 points each on a 3 x 4 foot table.
The armies lined up at the start of the battle. The Scots in the foreground, mixed pike and shot in the centre, lancers on the right flank, pistols on the hill on the left flank and a reserve of pike in front of the baggage.
Grimstone's three new modelled infantry regiments are in the centre with 400 ironsides deployed as a refused flank on the left of the picture and his dragoons and remaining Ironsides on the right.

Early moves - the Scots pistoleers have moved forward off the hill to support the attack in the centre by the massed infantry. The Scots right flank stands firm while keeping a wary eye on the advancing Ironsides opposite them.
The Scots have (improbably) made havoc amongst the New Model horse on the left, in the centre they are winning the firefight and on the extreme right 150 lancers have bravely charged 400 Ironsides
Lancers have died bravely - the Ironsides withstood the shock of their charge and then set about them with sword and pistol. The Scots are hurridly trying to redeploy their infantry before they are rolled up from the shattered right flank. In the centre though the New Model is collapsing as the rolling volly fire from the Scots infantry takes its toll. On the right the Ironsides charge in but are stopped by heavy fire from the Scottish horse and supporting musketeers.It's a close run thing but panic grips Grimstone's army as the losses in the centre leave a gaping hole and his right flank is shattered. Ferguson is triumphant!
Saturday, 1 December 2012
'This War Without An Enemie'
![]() |
| Periwinkle Brushes Aside a Rebel... |
I have managed to get a fair amount of gaming in over the last few weeks, not that you'd know from the posts on this blog.
This is partly because every game I've played has been set during the 17th Century English Civil War - and it has been English - Royalists versus Parliamentarians in 1642, '43, '44 and 45 - with the exception of one game as the Royalists against an Allied Parliamentarian-Scots Covenanter Army, but that been the extent of the participation of the other kingdoms in the struggle.
We use DBR rules and play 300 point games in 15mm on a 4' x 3' table using pre-set terrain. This is a departure from DBR's recommended table size and 'Preparing for Battle' terrain placement and is an innovation thought up by Keith McNelly at The Wargames Room http://thewargamesroom.wordpress.com/ Keith is a regular opponent of mine and a gentleman to boot - the breadth and depth of his wargaming interest is vast and he is also a real
contributor to out hobby, developing scenarios, organising competitions, actively promoting rules systems and welcoming newcomers. This little tweak to DBR has been a revelation- no more fluffing around before getting stuck into what most wargamers really want to do: pushing toy soldiers around and rolling dice.
We're now getting an enjoyable game inside 2 1/2 hours, which makes for a relaxing evening even if it is mid week and we have to go to work in the morning.
I've enjoyed limited success in my games and made some spectacular unforced errors - marching a column of Royalist cavalry across the face of Scottish cannon and then letting the survivors get charged and destroyed by the Scots Lancers being by far the worst.
Another of my regular opponents, Chris, has just moved out of town and will be sorely missed. Our games over the last few years have been great fun and no one could predict who would win. Chris has a great sense of humour and never took playing too seriously, just seriously enough to make our scraps entertaining and absorbing. On the good side, now I have an excuse for a holiday in his new home town
Jeff has recently started playing DBR in earnest and acquitted himself well as General Harbottle Grimstone, commanding a detachment of the New Model as they routed Sir Lancelot Periwinkle's cavaliers in an action in the environs of Much Snogworthy - this was a little known engagement battle fought prior to the decisive encounter at Naesby the following month. Harbottle's Ironsides rode down the Royalist Horse on his left flank and his infantry held their nerve and their ground despite the right giving way to a combination of galloper guns and cavalier charges. Jeff is another true gent and our games have been a pleasure.
I've been sketching out a little narrative to accompany this 'War Without an Enemy' featuring Grimstone, Periwinkle and Sir Henry Dudhop and others. We've yet to involve the Irish or the Scots, but, as I have armies to represent them it's only a matter of time before the war in England spills over into the other kingdoms. Over the summer I may write this up in more detail.
No photos of the toys soldiers in the battles I'm afraid, but here's a couple of others to be going on with.
| New Model Pike Steeling Themselves For the Royalist Charge Scots musketeers massacre my cavalry... |
Subscribe to:
Posts (Atom)